In this post, we will cover how to set cart notices with buttons, with call to actions that can be links to other pages, or trigger a 3rd party popup (from another plugin).
As we saw in this previous post: “Custom cart messages on WooCommerce“, using the Fish and Ships special action “Show notice message” we can show messages under the necessary conditions.
Table of Contents
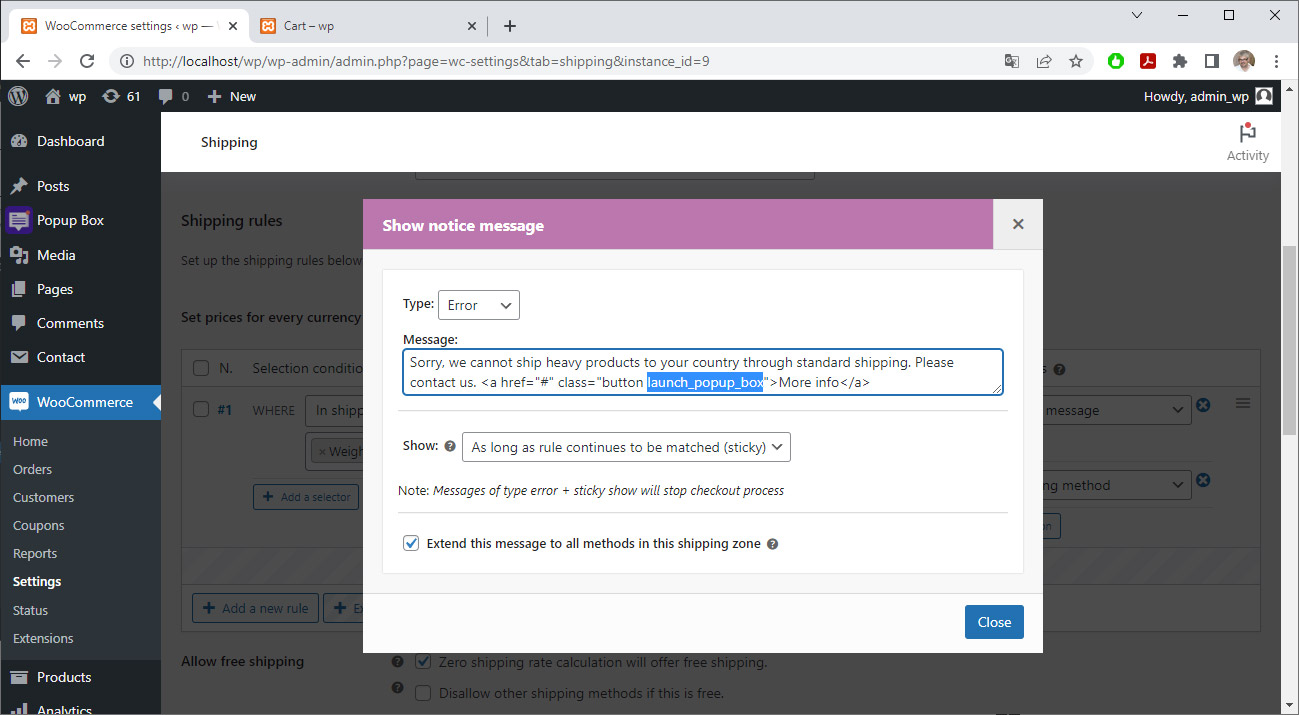
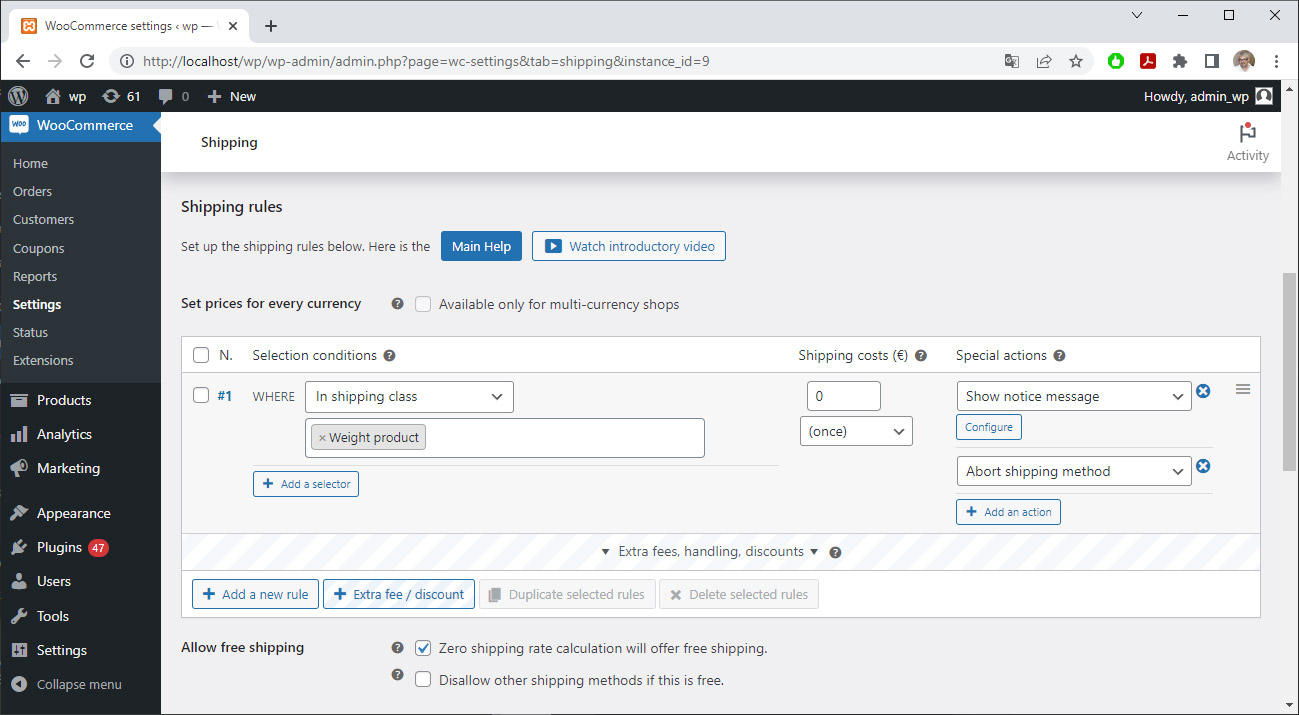
We can add cart notices with button by simply adding a bit of HTML code into it. First, we must add the rule, with the needed conditions, and the special action: “Show notice message”:
And here the HTML code for the button inside the cart notice message:

Here the result. Please, note that we’re using for this demonstration the default Storefront theme for WooCommerce, using his own “button” class for buttons on the cart notices:

Maybe your theme use another classname for buttons, or maybe you want to stylize it. In this case, we will give you an example at the bottom of this post, please, continue reading 😉
Button in cart notices that opens a popup
Maybe you want to give more information about the cart notice to your customers. Or maybe you want to give a contact form in a popup, instead of send your customers to the contact page. Or maybe you want to offer a login into popup for your B2B products. There is infinite possiblities.
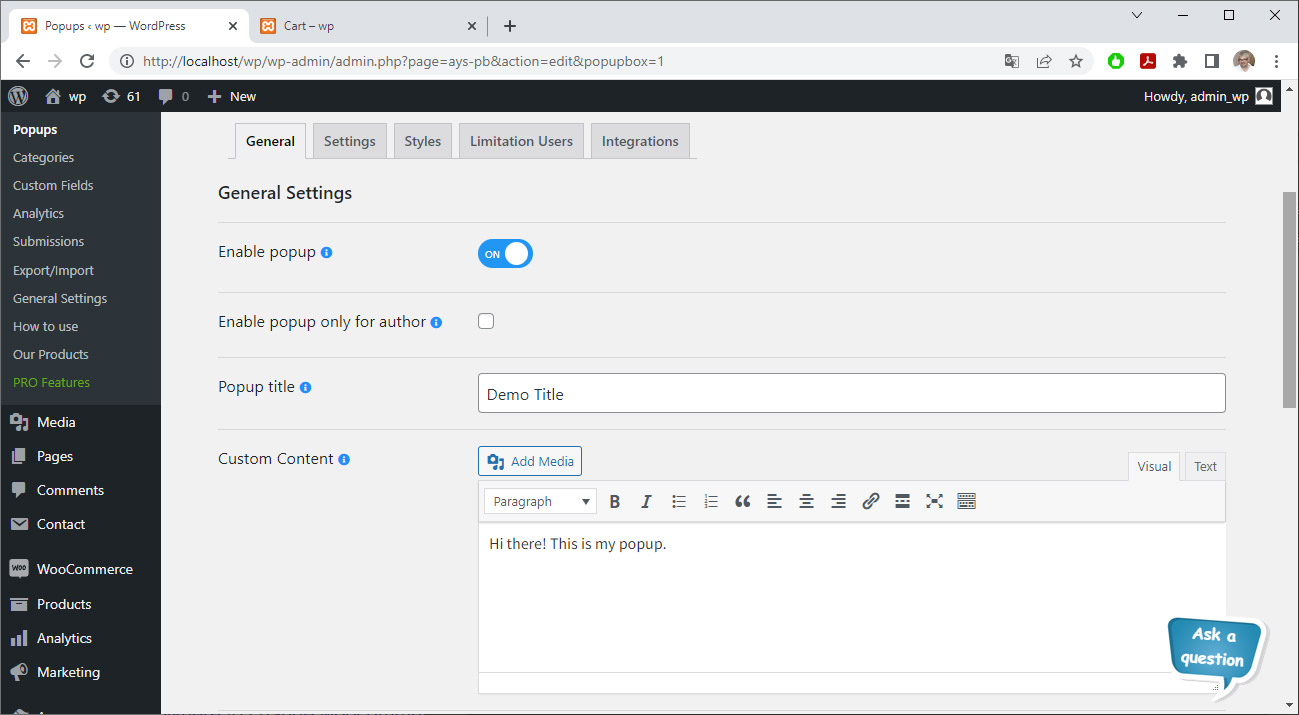
With the WordPress Popup plugin you can easily add a popup. There is a free version on WordPress repository, and a premium one with amazing extra features, like contact or login forms.
Here we will define a simple popup:
Ensure that will show on all pages, and set the key feature: the class that the plugin will looking for to open the popup, in our example “.launch_popup_box”:
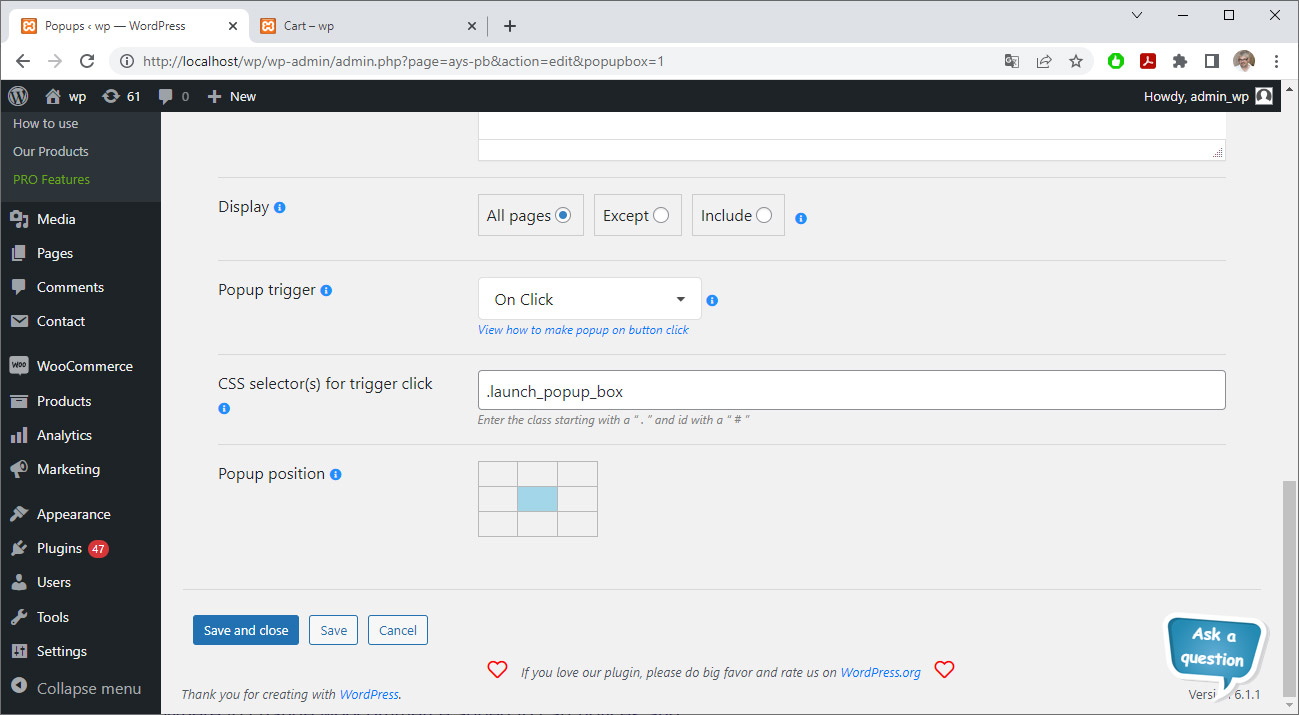
Now we will put this class into our button code. The Popup plugin will lookin for this class:
And here the result: When our customer click on the more info button, the popup is shown. You can put whatever you want in the popup: more information, contact form, login form, etc.

You can style your buttons using custom CSS. In our example, we will modify the Storefront buttons in the cart notices. You can create more than one custom class. Please note that there are three different types of messages: message, info and error.
In wp-admin side, go to Apparence > Customize > Additional CSS. You will be able to see the changes live:
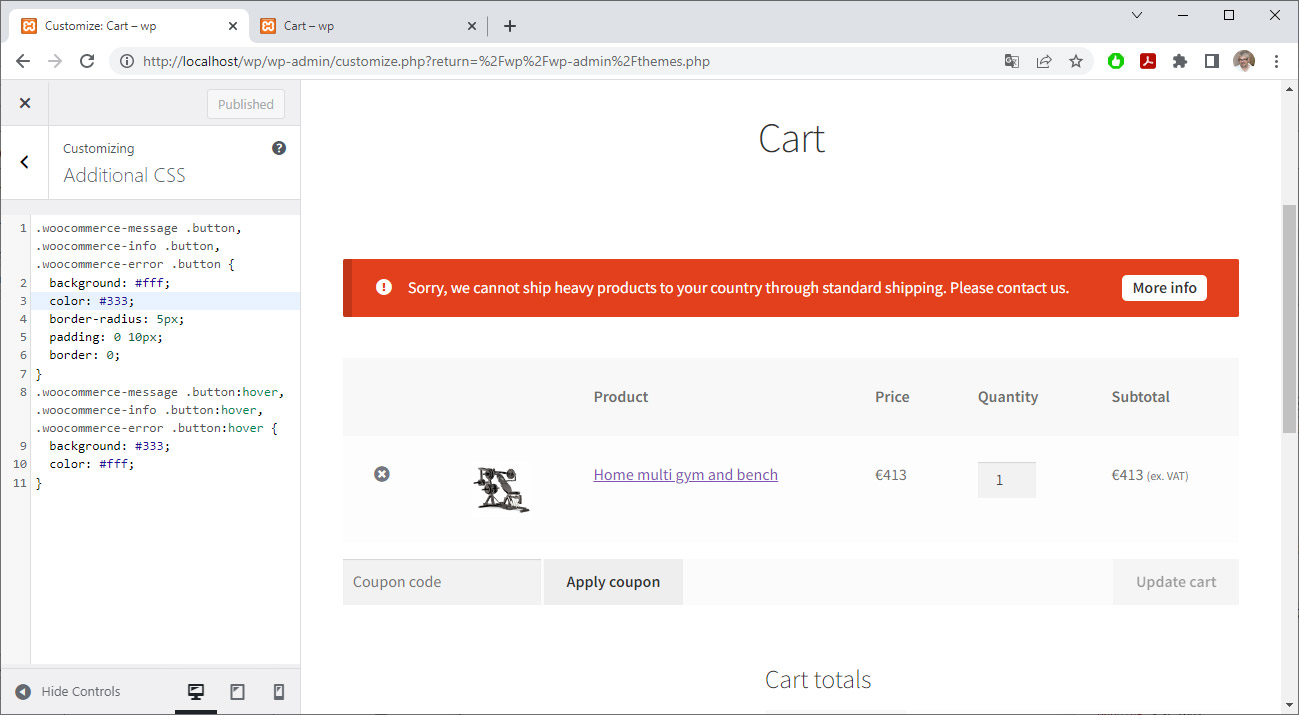
Here the CSS code on our example:
.woocommerce-message .button,
.woocommerce-info .button,
.woocommerce-error .button {
	background: #fff;
	color: #333;
	border-radius: 5px;
	padding: 0 10px;
	border: 0;
}
.woocommerce-message .button:hover,
.woocommerce-info .button:hover,
.woocommerce-error .button:hover {
	background: #333;
	color: #fff;
}


